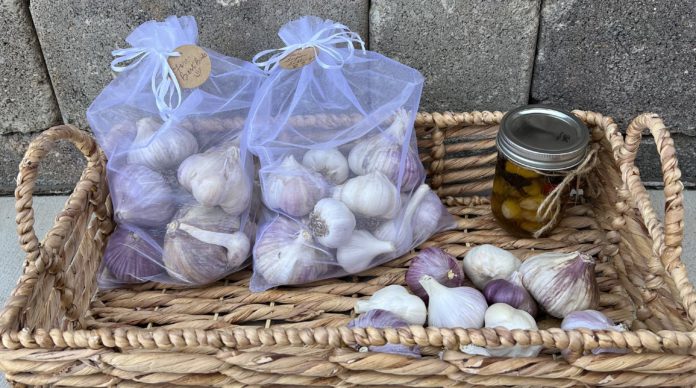
Planting garlic has become a ritual in my home garden. It started as a garlic plant showing up in the compost pile, and then there was no looking back. It is now one of my favorite crops to grow for many reasons—seed garlic is available almost everywhere, planting is easy, and plants do not require a lot of attention and care, store for a long time and can be used in many ways. Most importantly, garlic does not require structure for support or climbing.
Garlic, Allium sativum, belongs to the family Amaryllidaceae. The bulb is made up of individual segments called cloves. There are two main types of garlic—hardneck (Allium sativum var. ophioscorodon) and softneck (Allium sativum var. sativum). Hardneck varieties have a woody stalk in the middle around which the cloves are arranged, and have more pungency, but have a shorter storage life of about four months. The hardneck varieties also produce a green stalk, called the scape, which can be used in cooking. Softneck varieties are less pungent, have more cloves, and have a longer shelf life of up to eight months under optimal storage conditions.
Some of my favorite softneck varieties to grow are Inchium Red and California Early. For hardneck varieties, I like Music, Spanish Roja and German Extra Hardy. Fun fact: Elephant garlic (Allium ampeloprasum var. ampeloprasum) is not a true garlic. It is a close relative of the leek and its bulb has very large, mild-flavored cloves.
Although growing garlic in a raised bed or in the ground has better chances of producing bigger bulbs, if a home gardener is limited by space, growing garlic in a container is equally rewarding. I always add a lot of compost to garlic beds or the containers, and fertilize again in about three months with a granular fertilizer.
To prepare for planting, gently open the garlic bulb and separate the cloves, keeping skins intact and avoiding damage to the root callus. Plant the largest cloves, as they will produce the largest bulbs. Plant with the pointy sides up. I like to plant garlic anywhere from mid-October to November before the ground is too cold to be worked in. Space each clove six to eight inches apart and plant about two inches deep in a location that receives at least six hours of strong sun. The cloves sprout anywhere from two to three weeks. During the initial weeks I like to hand water to give the sprouting cloves enough moisture. Once the rains start, I let them take over until spring. I stop watering two weeks prior to the harvest time.
The time to harvest garlic depends on the variety, planting time and local climate, but is generally around June to July. When the bottommost leaves on the stalk start to turn brown, garlic is about ready. Rather than pulling up the stems, using a trowel or gardening fork, gently lift the garlic bulb along with surrounding soil and brush off excess dirt. Harvest all bulbs that look ready and cure the garlic in a well-ventilated location sheltered from direct sunlight.
There are many ways to cure garlic. Some gardeners prefer to wash dirt off, while others like to remove the outermost layer, and still others swear by cutting the stems and roots right away. My approach has been to not wash the garlic, and not cut the stems or the roots for the first four weeks while they are curing. I remove any leaves that are dry and look diseased and let the garlic bulbs cure in a single layer on a surface like a wire rack. I like to inspect the garlic once a week for pests or rotting bulbs and remove dirt that’s dry and falls off easily. After curing for about five weeks, cut off the tops and trim the roots to finish the curing process.
There are many ways to use and store garlic. It can be made into paste and frozen as cubes, cloves can be peeled and frozen, or garlic can be dried and stored as powder. Homemade garlic bread and sweet potato fries sprinkled with sauteed minced garlic and parsley are a couple of my favorite indulgent foods.
Garlic soup
In an oven-safe container, roast 15-20 peeled cloves of garlic at 225 degrees Fahrenheit for about 45 minutes, making sure they are covered in oil. In a heavy bottom pan, add a few tablespoons of olive oil or butter. As soon as it warms up, add half a cup of diced white or yellow onion, and a few minutes later, add half a cup each of diced celery and carrots, with about 10 cloves of minced garlic to add pungency. Add salt to taste and sauté on medium heat until vegetables look translucent. Add the roasted garlic cloves to the pan, incorporating everything together. Roasted garlic adds creaminess and sweetness to the soup. Adjust the total amount of garlic to your liking.
Turn the stove to low and add in stock or water. Bring to a boil, and let it simmer for 10 minutes. Use a blender to blend the mixture well. Don’t prefer to blend? No problem. One can add in butter or heavy cream to make the contents more luscious. Add freshly ground black pepper, adjust salt to taste and garnish with any herbs your garden has to offer. Enjoy with sourdough croutons or a grilled cheese sandwich for a comforting evening meal.
Note: This article gives an overview of growing plants, sun and soil requirements, moisture needs, etc. Plant health and growth will vary based on various factors. This article is intended for gardening and culinary inspiration only. Please consult your healthcare provider should you have any questions or concerns about adding any new foods or ingredients to your diet.


