

Freshly-grilled corn on the cob, sprinkled with seasoning, a hint of lime juice and a garnish of butter on a lazy afternoon is my definition of unwinding. When that corn comes right from our backyard garden, it’s rewarding as well. With multiple varieties, easy-to-germinate seeds, and the option of succession planting in one season, corn is a winner for my garden.
Choose a sunny spot for planting, as corn needs at least six to eight hours of direct sunlight each day. Because corn is wind pollinated, planting it in a block instead of just in a row improves chances of pollination. Corn prefers well-draining, fertile soil that has been amended with lots of organic material. As corn is a heavy feeder, a couple of mid-season fertilizer additions keep the plants going. It also needs ample watering. I prefer drip irrigation; when I hand-water corn, water settles between the leaves and stalk, inviting pests and diseases.
Although seedlings are available in local nurseries and garden centers, I enjoy planting corn from seeds. The seeds are big enough to handle easily, and they germinate quickly. I am also able to try newer varieties for which seedlings aren’t available in nurseries. So far, I’ve grown: glass gem, blue corn, true gold, and honey and cream.
I soak corn seeds overnight and plant each seed about an inch deep and six inches apart. There are different recommendations on spacing between rows, ranging from two to three feet, but being a home gardener with limited space, I have kept spacing to about a foot, and it hasn’t been a problem. If I observe crowding, I thin out a few seedlings as needed.
I try to plant four to five rows in a five-by-five foot area. The summers I haven’t been able to plant in a designated area of a desirable size, I ended up planting in clustered containers, and they did well there too. When planting in containers, make sure corn has plenty of nutrient-rich soil and containers are sturdy enough to support the plant as it grows. I used food-grade buckets and drilled holes for drainage.
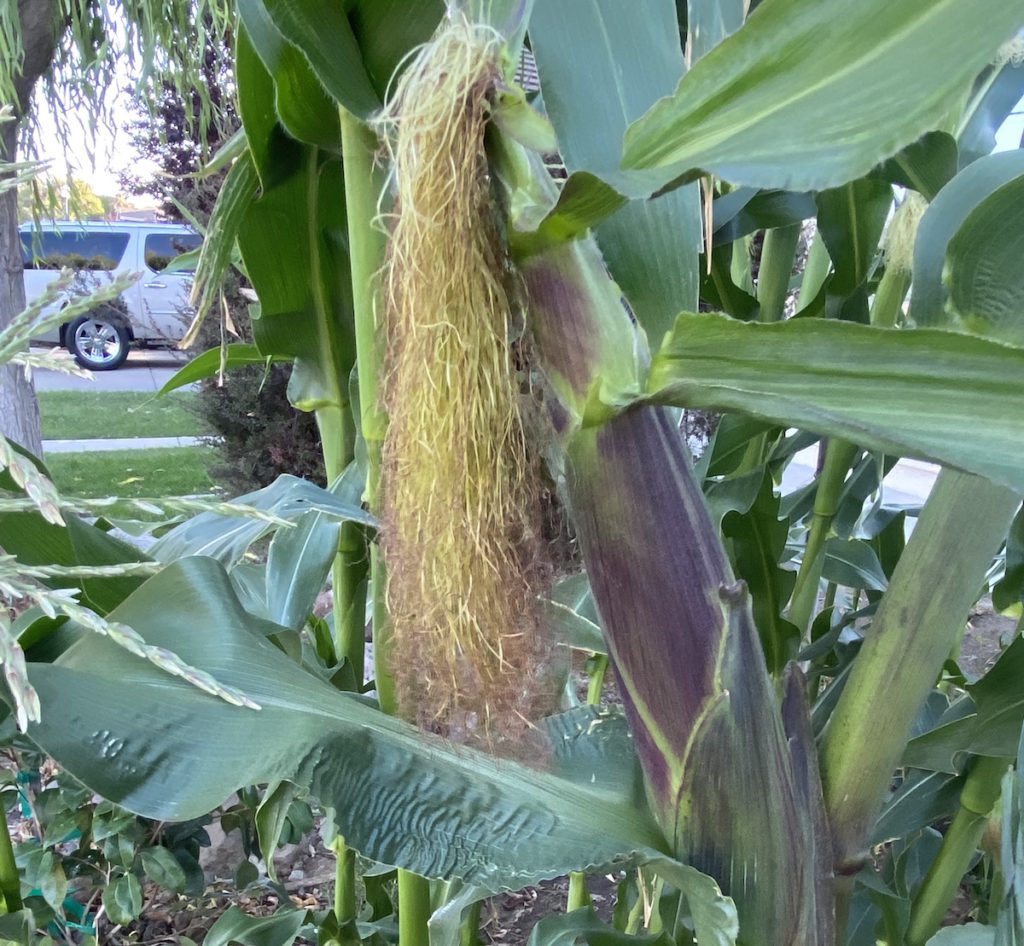
While many plants rely on bees, birds and butterflies to help with pollination, corn is pollinated by wind. The tassels on the top of the plant travel by air to pollinate the silks that make the kernels. Hence planting in a block or keeping the containers in close proximity. Insufficient pollination is responsible for the common issue of unfilled or partially filled ears. Because different varieties of corn can cross pollinate through wind, it’s recommended not to plant corn varieties close together in order to keep them to be true to their variety.
Another exciting aspect about planting corn is that it can be planted in succession to get a continuous supply of produce (although two harvests are enough for our household in a season).
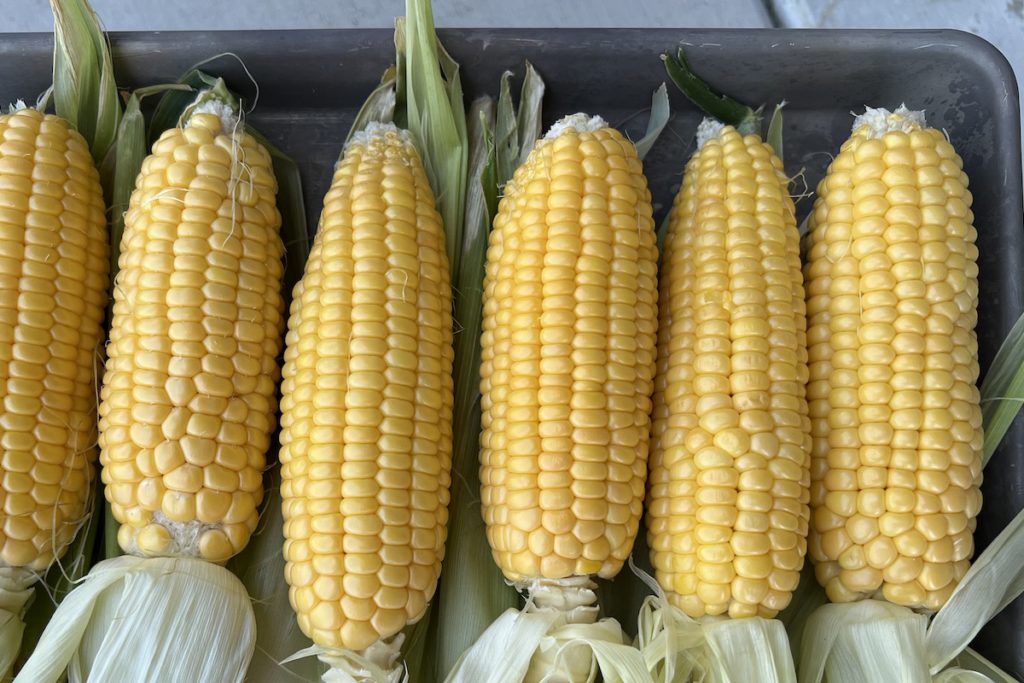
Corn is ready to be picked when the silks turn dry. The other sign to look for is that the ears feel full and filled out inside of the husks. At that point, gently pull the ear towards yourself to detach it. I like to harvest corn right before I am ready to prepare it. If I need to store it for a day or two, I leave a few layers of husk that are close to the kernels, after inspecting for any pests, and store in a zip-top in the crisper section of the refrigerator.
Some ways we like to enjoy the harvest:
Grilling:
Cook on the grill, rotating consistently for even charring. If using an oven, preheat to 400 degrees Fahrenheit, wrap de-husked corn ears individually in foil and cook for about 30 minutes, rotating midway. If you prefer the charred look, unwrap the ears when they are cool enough to be handled and leave them under a broil setting for a minute or so, making sure they don’t burn.
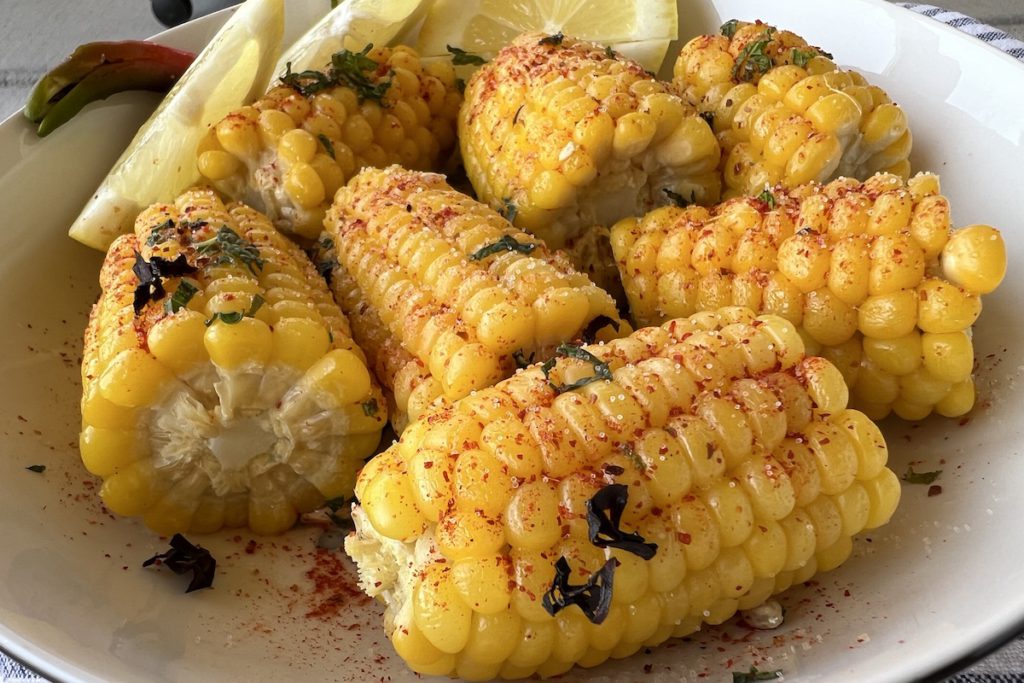
Taste and texture will depend on the variety, cooking time and method. Some corn varieties become chewy sooner than others after harvesting. Grilled ears can be enjoyed sprinkled with flavoring agents, or the scraped kernels can be added to salads. To make a salad with grilled corn kernels as the star attraction, add black beans, onions and avocado slices, over a bed of greens sprinkled with lime or lemon juice. Spice it up with tomato salsa, jalapenos and hot sauce.
Corn kernels can also be dried, made into flour, and rolled out as a flatbread. A dear recipe popular in Indian ethnic cuisine is corn flatbread (“makki di roti”) served with cooked mustard greens tempered with a medley of spices and aromatics (“saryon da saag”).
Preserving:
I like to blanch the ears for about three minutes and then cool them in several changes of cold water. Scrape the kernels off with a knife and freeze them in a freezer-safe container, leaving about an inch of space. Make sure to label the contents and date before storing. For recipes where corn is cooked as part of the prep, I freeze uncooked kernels. Scrape the ears using a knife. Put them in a zip-top bag, label the contents and date before storing in the freezer.
When I harvest corn, I ponder the beauty of the ear: silk on the top, and layers of husk covering intricately arranged kernels. As I unwrap the ears, I hear the memories of family gatherings and traditional recipes.
Note: This article gives an overview of growing plants, sun and soil requirements, moisture needs etc. Plant health and growth will vary based on various factors. This article is intended for gardening and culinary inspiration only. Please consult your healthcare provider should you have any questions or concerns about adding any new foods or ingredients to your diet.

