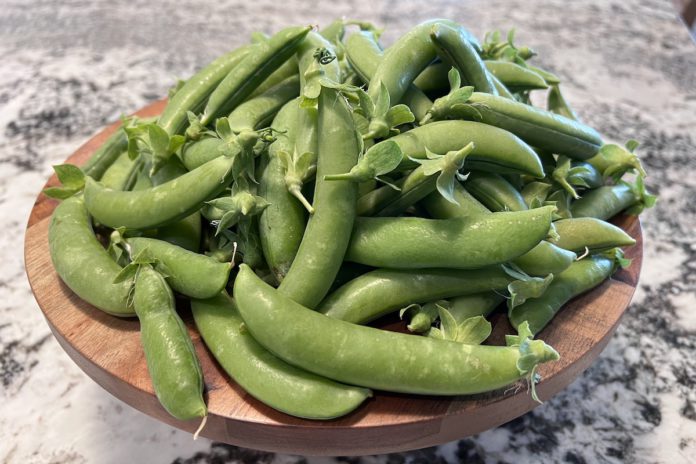
Pea plants (Pisum sativum), belong to the family Fabaceae and are cool weather legumes that are grown for their pods and seeds, called peas. The tender shoots of the plant are edible as well. Different varieties produce different kinds of pods. While both snow and sugar snap peas have edible pods, sugar snap pods are thicker, and their pea size is also bigger. “Shelling peas” are collected from the pod.
Peas grow best when grown during cool-weather periods. They can be planted in fall for a winter harvest and in early spring for a summer harvest. This allows some gardeners to plant peas more than once a year, although planting in spring may shorten the harvest window due to warming weather.
When planting peas, choose the variety based on the type of space your garden has to offer. Bush type pea varieties are about two feet tall and have a shorter and earlier production period. They don’t really need support, but I like to put a tomato cage around them to keep their branches away from the ground. This helps with air circulation and can keep pests away. The vining types are much taller and can reach four to six feet or more, have a higher yield and produce for a longer time. They also require taller and sturdier support structures. Depending on variety and planting time, peas take about 60-70 days before pods are ready for harvest. Once they start producing, one can expect to harvest the pods every few days. For a continuous supply grow them every few weeks.
I have not found much difference in starting seeds indoors versus directly sowing them outside. I soak the seeds overnight and sow them in pairs, snipping out the weaker as they start to grow. Bush varieties perform similarly when planted either in containers or the ground, but I almost never plant vining varieties in containers as they can become unwieldy. While peas are nitrogen fixing plants, I have had to fertilize them at least twice during the growing season, preferring a low nitrogen fertilizer for quick feeding.
Pea plants are affected by a few diseases and pests. Powdery mildew and spider mites have affected my plants the most. Powdery mildew generally appears as yellow spots on the upper surface of older leaves, spreading gradually to the undersides. A combination of conditions like warm and dry days with cooler nighttime temperatures and humidity can cause powdery mildew. Selecting resistant varieties, planting in unshaded areas and avoiding excess fertilizing are some ways to get ahead of powdery mildew. To dislodge spider mites, spray the plants with a garden hose, especially on the undersides of the leaves and wash the dusty areas and walkways with a forceful jet of water. Spider mites like hot, dry and dusty conditions, and hosing off the plant helps keep it cool and clean as well. Doing this during the early part of the day allows moisture to evaporate. Horticultural oil and insecticidal soap can be effective on mite eggs. Infested plant disposal, regular de-weeding and cleaning up debris reduces host and overwintering sites for pests.
Harvest time for pea pods depends on the type. Harvest snow peas when pods are about three to four inches long, and when the peas inside start to show their presence. Sugar snap peas are ready when the pods are young, crunchy, have filled up and make the “snap” sound. Shelling peas are ready as soon as the peas have filled up the space inside the pod and look well developed. Pods should feel firm, and peas should be at the expected size.
Cook or process the peas for storage soon after harvesting as they can overmature quickly. My favorite way to eat peas is raw. Sugar snap and snow peas make great additions to salads and in vegetable trays. They can also be enjoyed as a side-dish sauteed with onions, tomatoes, ginger, garlic and spices. Shelled peas can be added into stews or blended into soups. When I am in the mood for indulging, I use them in samosa and paratha stuffing. Shelled peas can last a long time frozen. Let’s have peas!
Easy peasy peas pilaf
This recipe uses one cup of white basmati rice that has been soaked for 20 minutes and two cups of water. In a wok or heavy bottom pan, add a teaspoon of melted ghee and as soon as it heats up, add a pinch of cumin seeds, a couple of bay leaves and one to two cracked open pods of cardamom. Once the cumin seeds have started to sputter, turn the heat to low, add two cups of water and bring it to a boil. Add a quarter cup of shelled peas and salt to taste and turn the heat back up. Drain the rice and add to the boiling water. Cook rice according to the instructions on the package. One can use vegetable stock in place of water. Skip ghee if not desired. This recipe makes one to two servings.
Peas and paneer dish
For a quick meal, use any store-bought curry or tikka masala sauce. This recipe uses half pound cubed paneer, two cups of sauce and quarter cup shelled peas. In a heavy bottom pan, add in the sauce, cubed pieces of paneer and shelled peas. Dilute the sauce with water or vegetable stock depending on the thickness desired. Cover the pan and allow it to simmer for about ten minutes on low heat. Garnish with finely chopped cilantro and serve with rice or roti. This recipe makes one to two servings.
Note: This article gives an overview of growing plants, sun and soil requirements, moisture needs etc. Plant health and growth will vary based on various factors. This article is intended for gardening and culinary inspiration only. Please consult your healthcare provider should you have any questions or concerns about adding any new foods or ingredients to your diet.


